In this article, you will learn more about:
Prodigy Commerce allows users to create multiple stores and manage them with a single login. A user can also have different roles for the stores that they are connected to. For example, when a user creates a new store, they will assume the role of Owner for that store by default. That same user may receive an invite from another Prodigy user to be an Admin or Staff member of one of their stores.
After creating your account and logging in for the first time, you will be directed to the stores page where you can click on the Add Store button to create your first store.
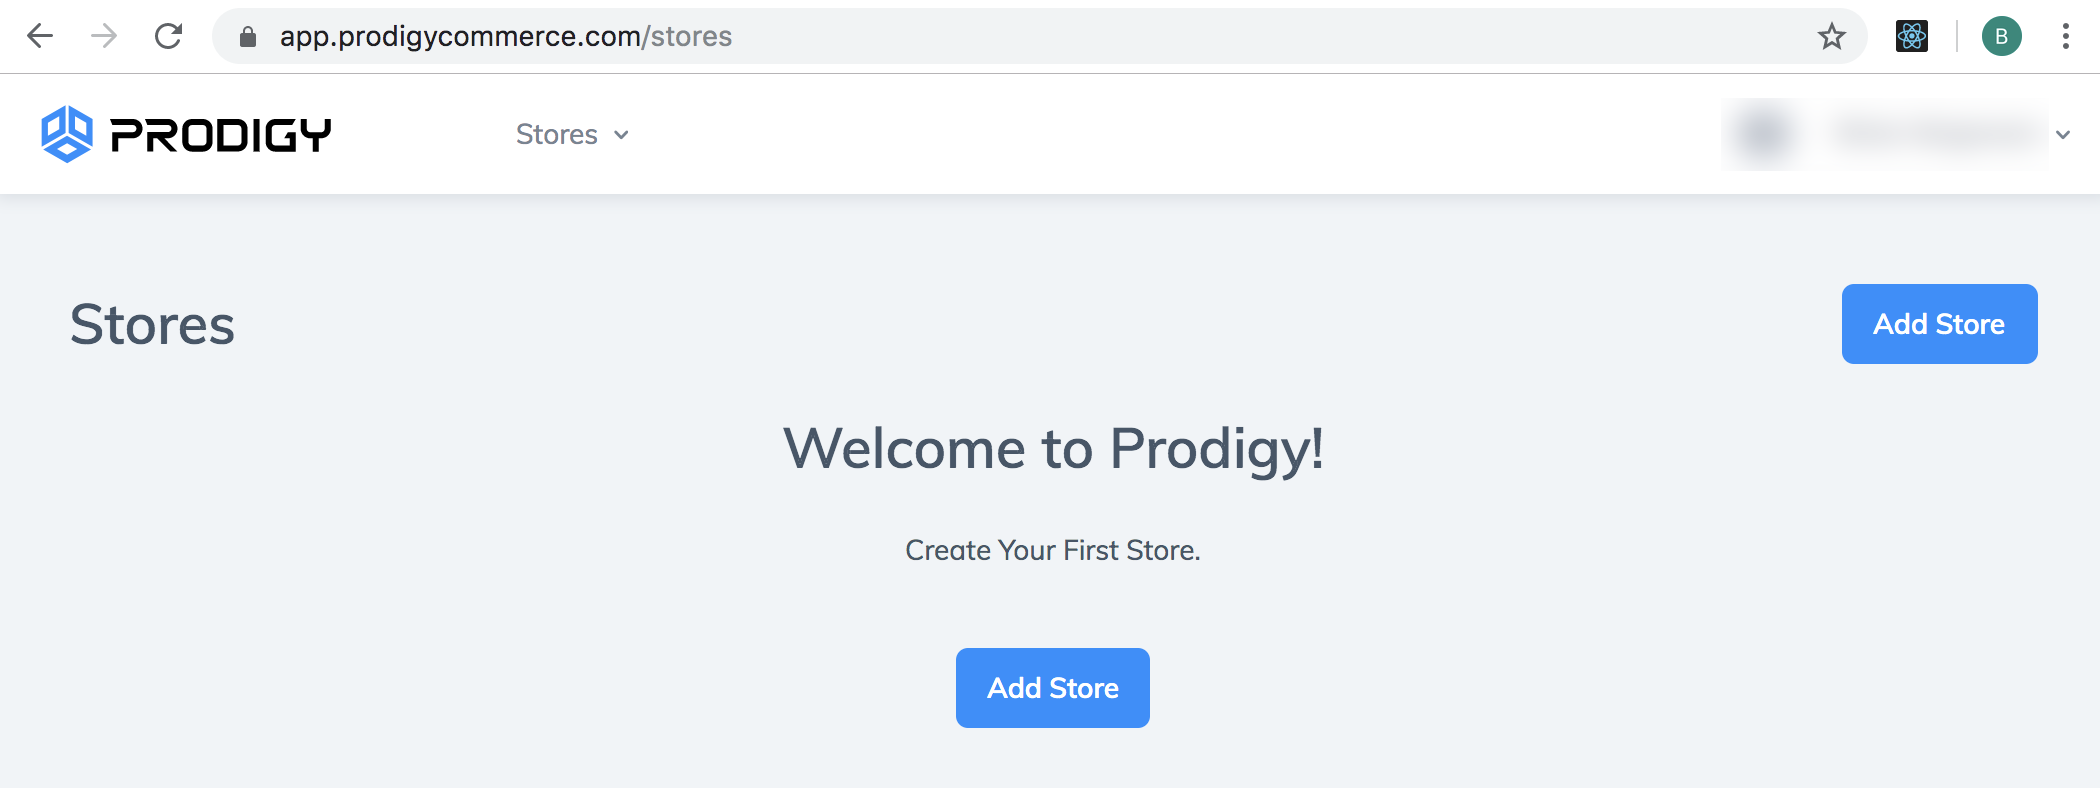
Creating your first Store
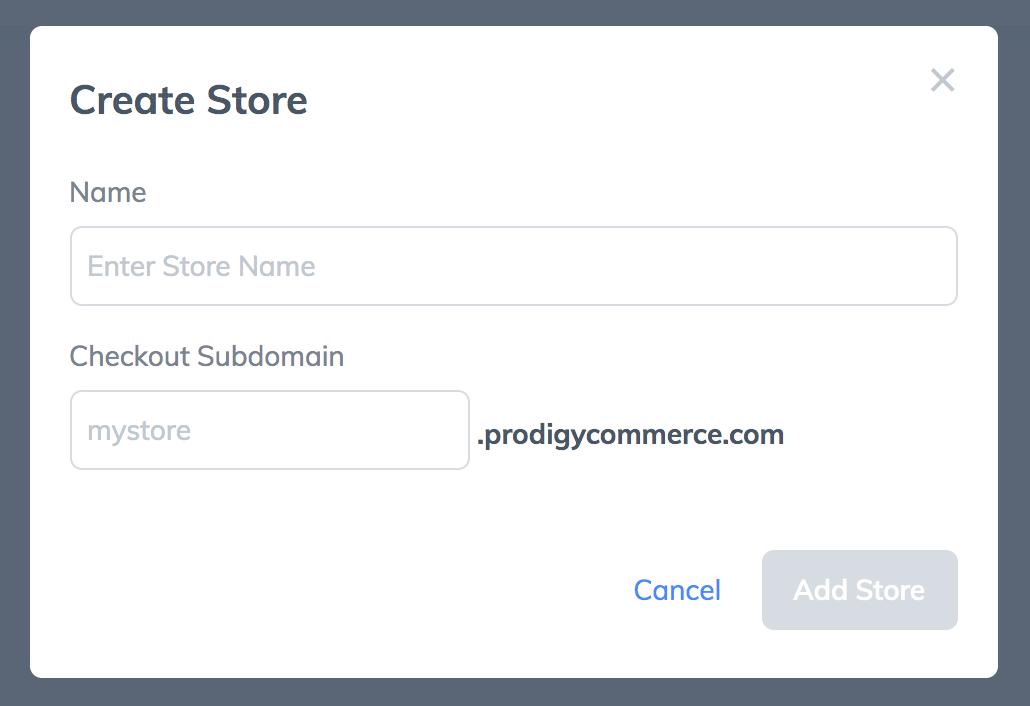
After clicking the Add Store button, a modal window will open where you will be asked to create a Store Name and a Checkout Subdomain. The Store Name should match the branding on your WordPress website as this name may be shown in certain email communications from your store to your customers. The Checkout subdomain must be unique and we generally recommend that you set this to the domain of your WordPress website. For example, if your WordPress store is located at "www.mystore.com", you would make your checkout subdomain "mystore.prodigycommerce.com".
After you complete these two fields, just click the Add Store button and the Store will be created. If you want to create additional stores, you can simply repeat this process for the additional stores.
Viewing your Stores
After you have created one or more Stores and you navigate to the stores page, you will see a list of all of the stores that you are a member of.
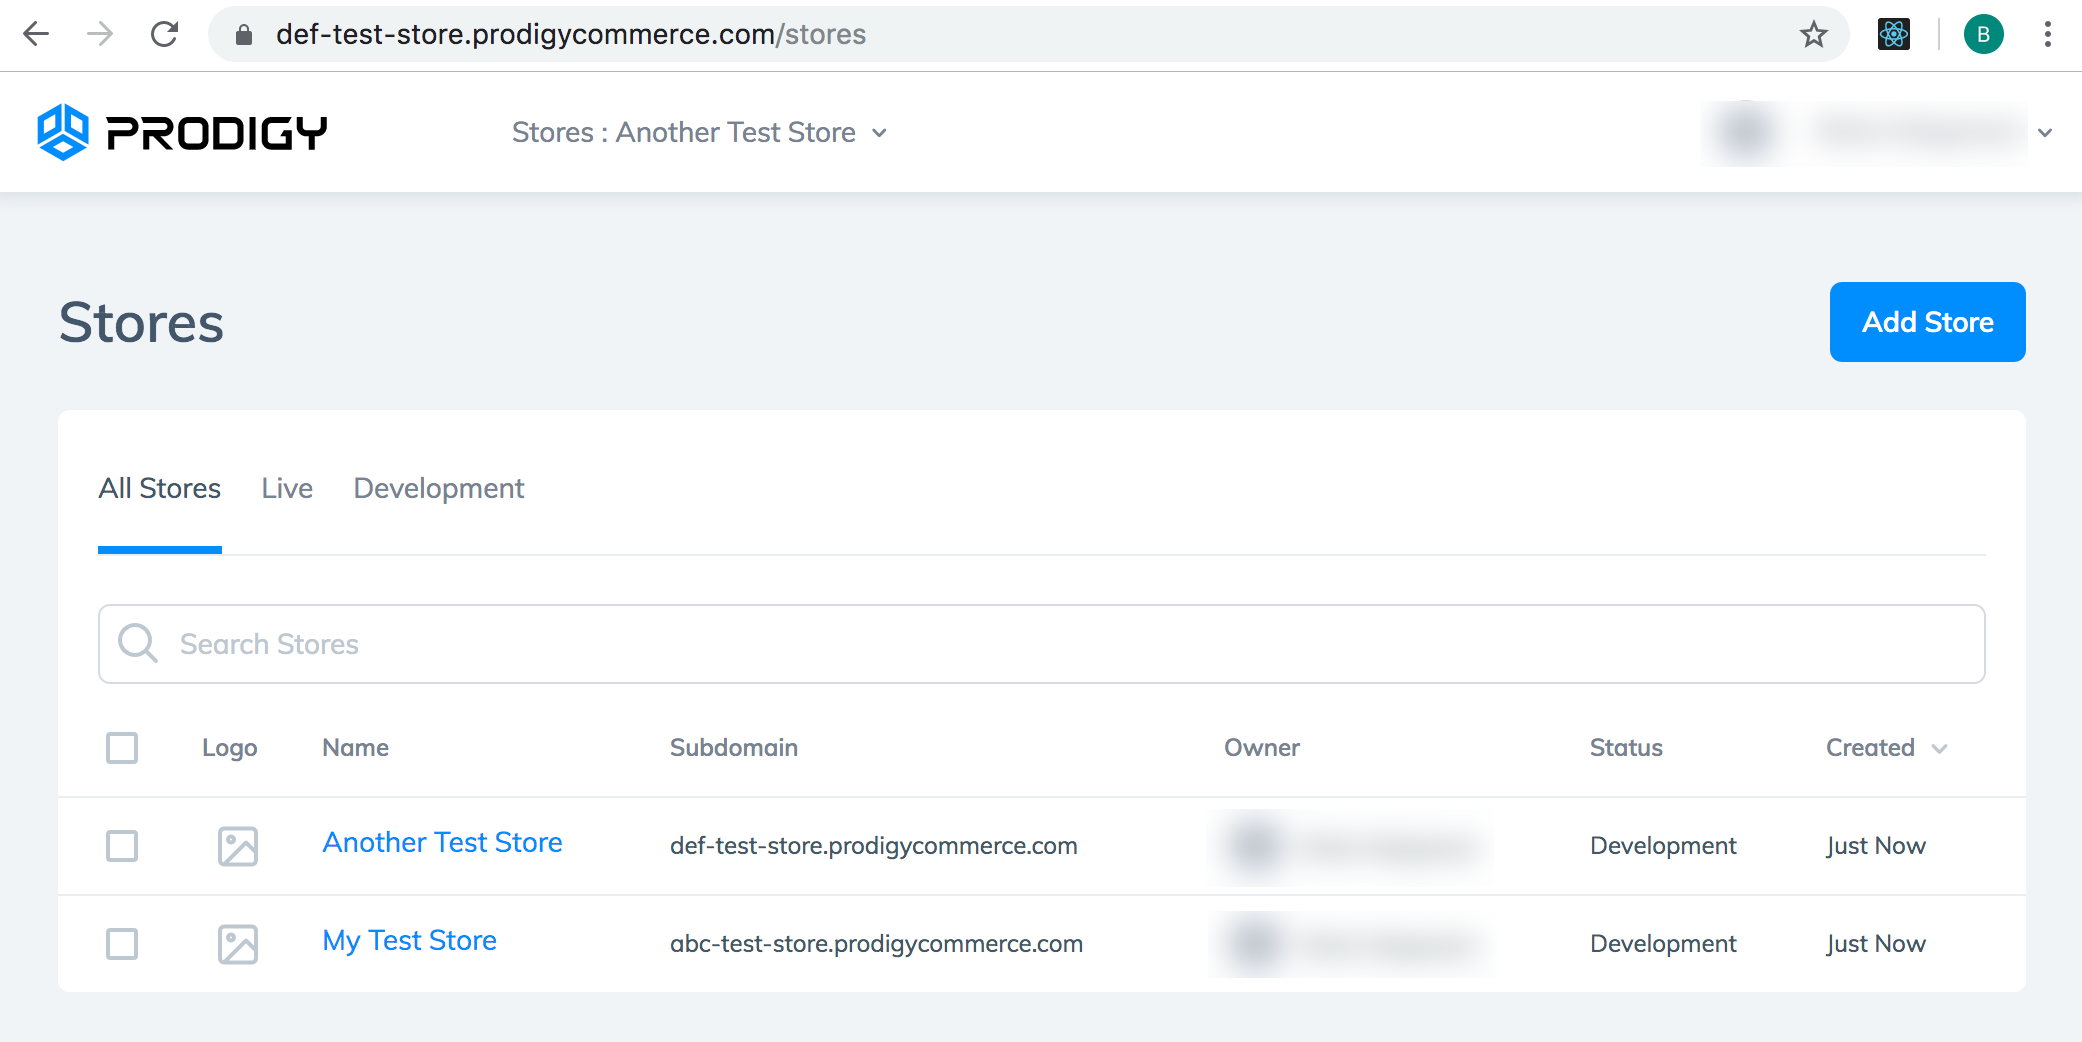
The tabs above the Stores list allow you to filter the list of stores by their status (Live or Development). Clicking one of those tabs will show only the stores with that status in the list. If you have many stores, you might also want to use the search bar to search for a store by name or subdomain.
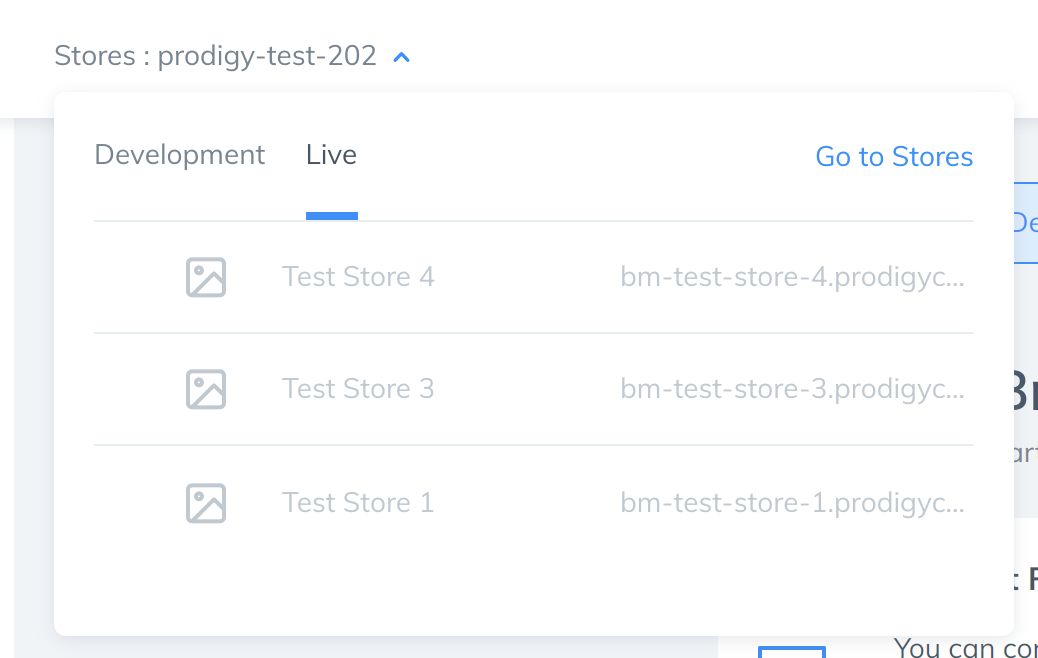
In the header of every page in the Prodigy platform, you will see a Stores dropdown that shows the Store that you are currently working with and allows you to navigate back to your Stores list or directly to any other Store in your account.
After you have created a Store, it will be available for connection from the Prodigy WordPress Plugin setup wizard. To learn more about the process of connecting your Store to a WordPress website, please see Connecting to the Prodigy Cloud Platform.