In this article, you will learn more about:
Managing the store status
By default, a new store will have the status of Development. This development mode is a sandbox environment that allows you to configure your store settings, test the checkout process, order management, and other features while you are developing the site.
To manage your store status, just log into your store and navigate to Settings -> General Info on the left sidebar menu. Scroll down to the Store Overview section and you will see the current status of the store as shown below.
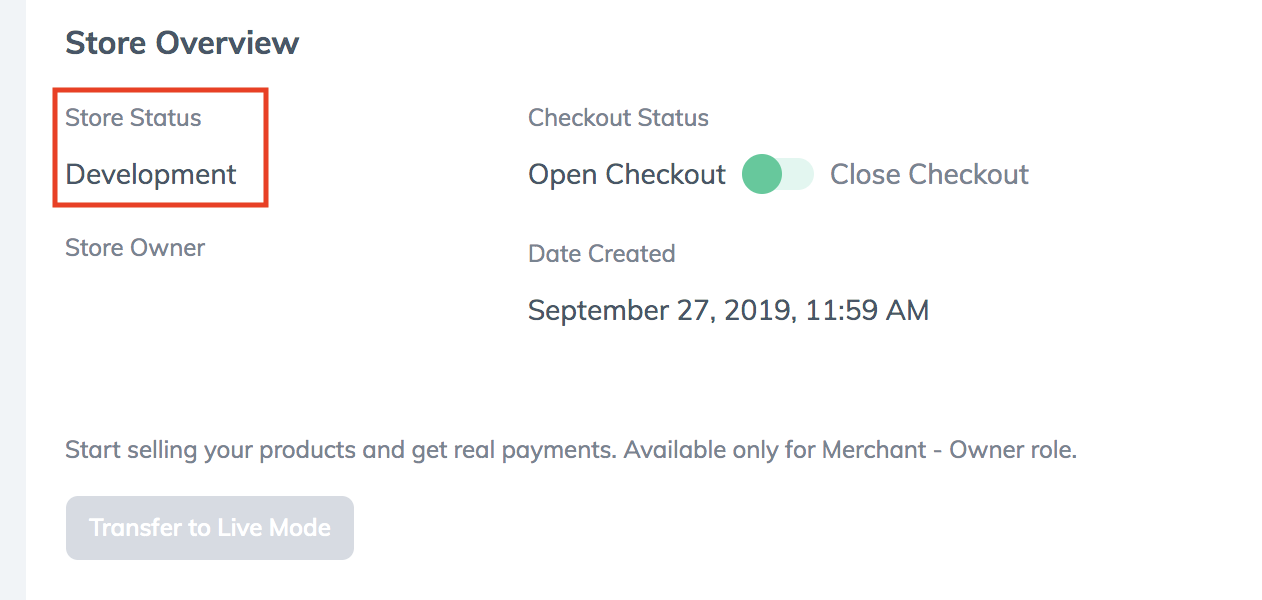
When you are ready to launch your store, you can move the store into Live Mode by clicking the Transfer to Live Mode button at the bottom of the Store Overview section. Note that this button will be disabled until a live payment method is added to your store. Read our Payment Settings article for more information about payments. It is important to note that once you change your store to live mode, it cannot be changed back to development mode. If you need to temporarily prevent customers from checking out on a live site, see the section below on managing the checkout status.

When your store is in development mode, you will see a notification across all Admin pages as a reminder that your store is not yet live.
![]()
Managing the checkout status
When you create a new store, the default checkout status will be Open. This means that you will be able to complete test checkouts in development mode or real checkouts in live mode. If you need to temporarily close your checkout, you just need to log into your store and navigate to Settings -> General Info and you will see switch to change the status in the Store Overview section as shown below.

When you click on the green switch, you will then see a dialog asking you to confirm that you want to close your checkout. This dialog also shows a message that your customers will see if they attempt to checkout while it is closed. This message can be customized as you see fit.
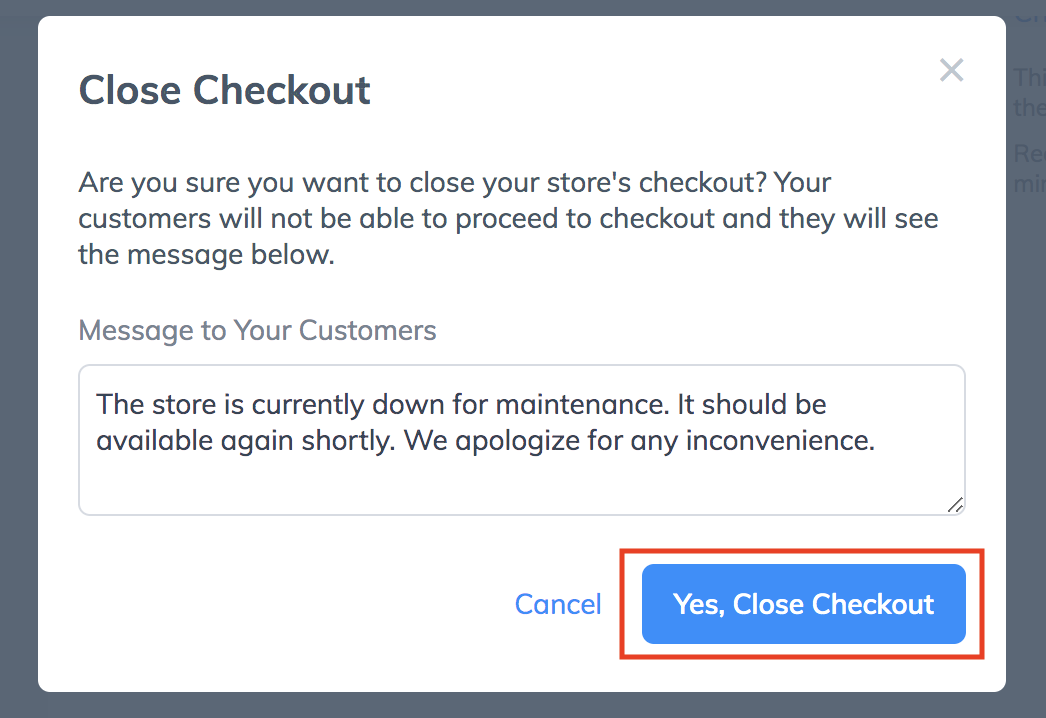
After clicking the Yes, Close Checkout button, you will then see the switch has turned red and shifted to the closed position.

To reopen the checkout, simply click the red switch again.